
All you need to ditch the indecision at the cheese aisle is a carton of milk and some everyday vinegar. No need to splurge on artisan wheels — with ingredients already in your fridge, you can make chewy, homemade cheese that feels fancy but is surprisingly simple. Lately, DIY recipes for cheese made from just milk and vinegar have been popping up online, and for good reason.
The trick is simple: heat low-temperature pasteurized milk, add vinegar to curdle it, drain the whey, then knead the curds several times until they’re elastic. This particular recipe breaks the process into 11 steps — from hitting the right milk temperature and adding the vinegar to straining, microwaving and kneading, then chilling in ice water. Below we walk through the temperatures, timings, and handling tips for each stage.
Hitting about 50°C and using 5% acetic acid… why this step separates the whey
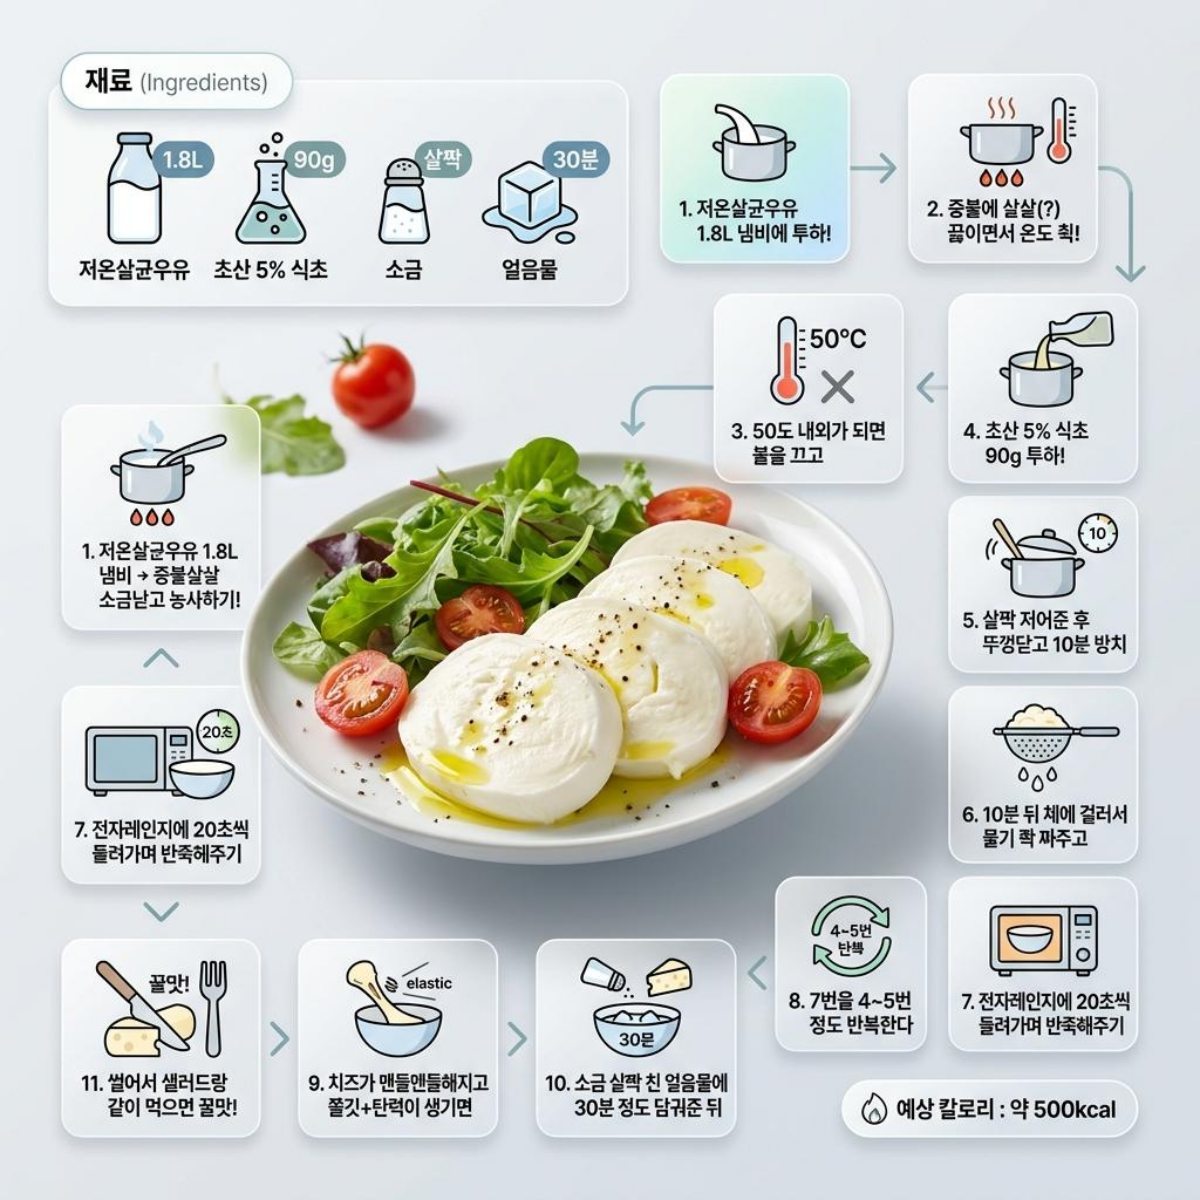
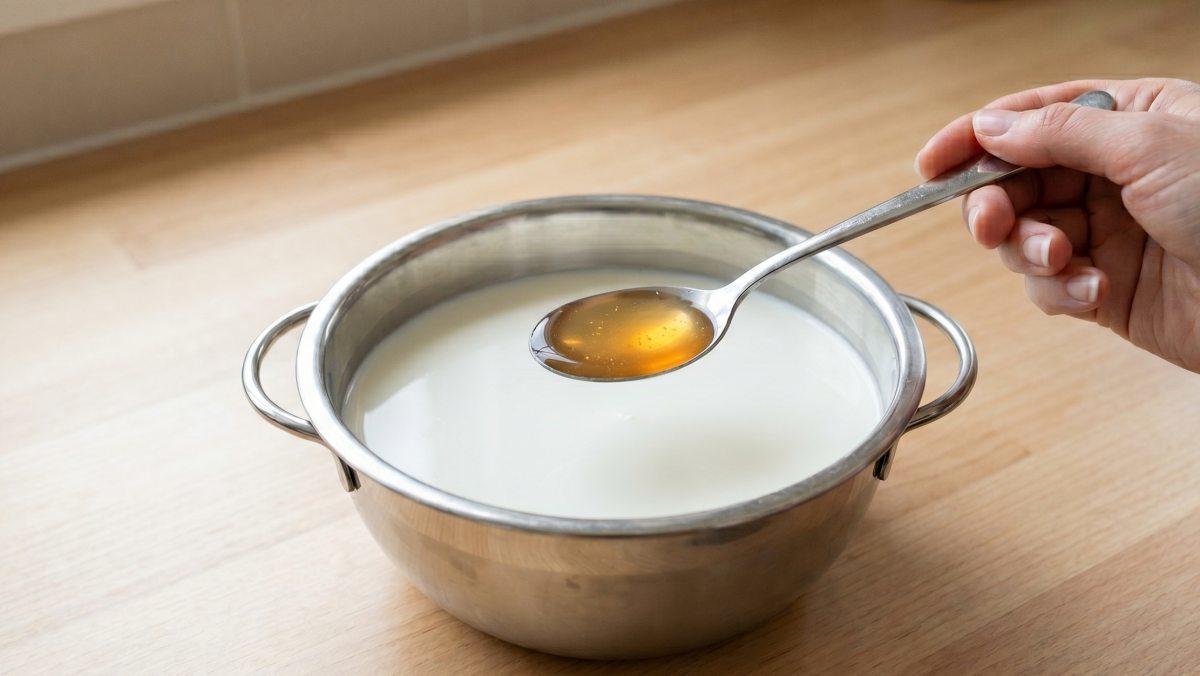
Everything starts with carefully heating the milk. Pour all 1.8 liters (about 61 fl oz — roughly 0.48 gallons) of low-temperature pasteurized milk into a pot. Use medium heat and stir gently so it doesn’t stick to the bottom. Keep an eye on the thermometer the whole time.
The pivotal moment is when the milk reaches about 50°C (122°F). Turn the heat off immediately. As soon as you cut the heat, add 90 g of 5% acetic-acid vinegar (around 3.2 oz, roughly 6 tablespoons). Stir briefly so the acid and milk mix evenly. Close the lid completely to block outside air and let it rest for 10 minutes. During this wait, the milk proteins and whey separate and the curds form.
Straining, microwaving, and repeated kneading to build that springy texture
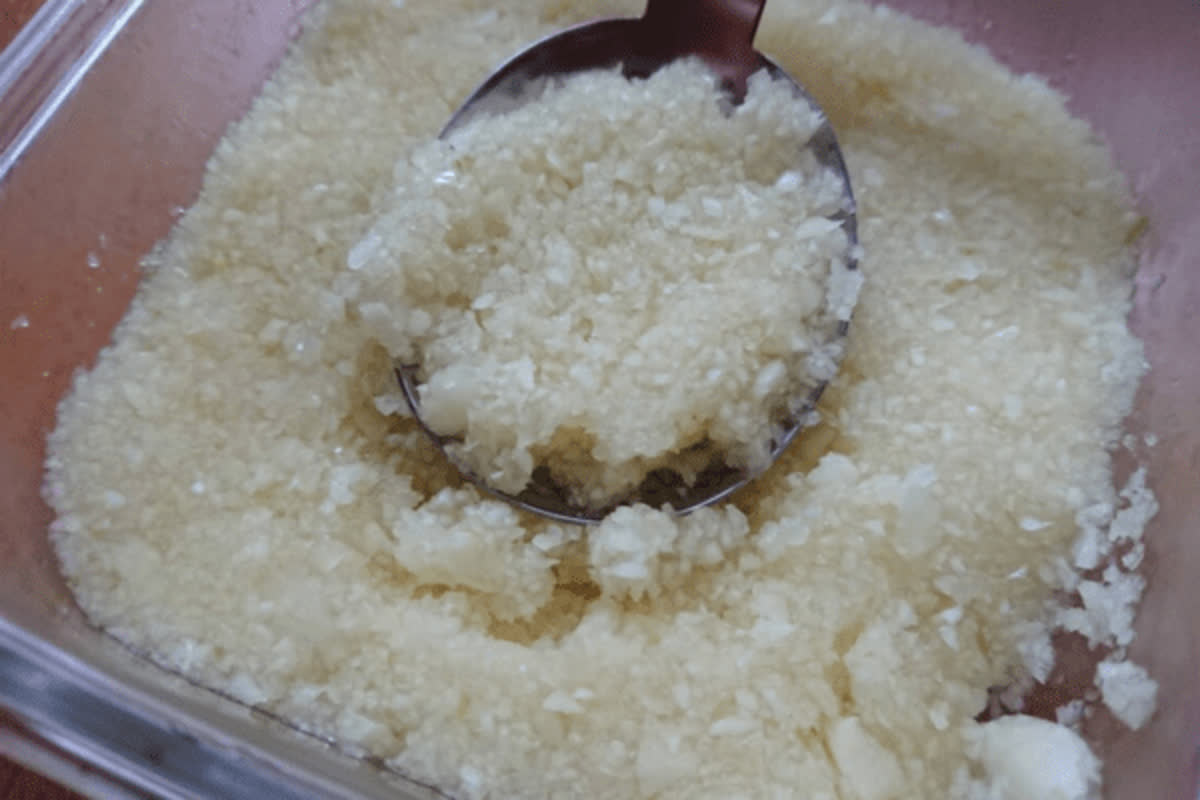
After 10 minutes, strain the pot’s contents through a sieve. Collect the curds left on the strainer and press them by hand to squeeze out as much moisture as you can. Once the moisture is removed and the curds are compacted, it’s time to heat and knead to develop structure and chew.
Pop the curd mass into the microwave and heat it for exactly 20 seconds. Pull it out and knead immediately by hand. Repeat this 20-second heat-and-knead cycle about four to five times. With each round, the protein structure tightens, the surface smooths, and the cheese gains that delightful chew and firm elasticity.
Salted ice bath quick chill, then serve with a salad
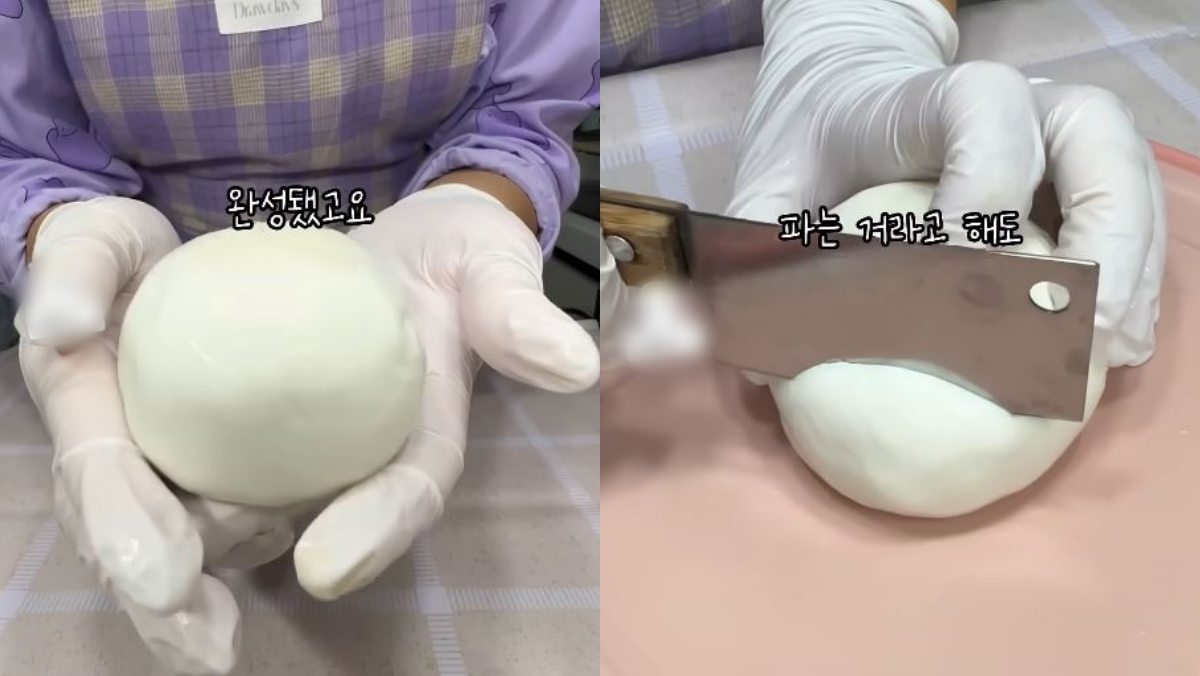
When the cheese surface is smooth and you’re happy with its elasticity, move to the chilling step to lock in the shape. Prepare ice water with a pinch of salt to season it, and fully submerge the cheese in that salt ice bath.
Let it sit in the cold water for about 30 minutes so the interior firms up. Afterward, remove the set cheese and slice it into the size you want. It’s lovely plated with a fresh salad — a small homemade triumph that tastes much more elevated than its humble ingredients suggest.

Why curdling acts like a magnet… how vinegar turns milk into cheese
The way a few drops of vinegar turn milk into cheese hides a fun, magnet-like bit of science. Milk’s key protein, casein, normally repels other casein molecules — think like bringing the same poles of two magnets close together, and they push away. That repulsion keeps the proteins dispersed through the liquid.
Add acidic vinegar and that balance collapses. The acid neutralizes the forces keeping the proteins apart, so the proteins snap together tightly, almost like iron filings being pulled to a magnet.
As these proteins cluster, they form a fine mesh that traps the milk’s rich fats between the strands, creating soft curds — the backbone of cheese. Water, lactose, and some nutrients that don’t join the mesh separate out as a clear yellowish liquid (whey) and drain away. Heating the milk speeds up this process, helping the proteins form a denser, firmer mass.
Tips to avoid pitfalls when making cheese at home with milk and vinegar

To get reliably elastic, tasty cheese at home, keep these rules in mind.
First: pick the right milk. Look for milk labeled low-temperature pasteurized. Common ultra-pasteurized milks are flash-heated at very high temperatures (often over 130°C / 266°F), which can damage the protein structure. Damaged proteins won’t clump no matter how much vinegar you add — they’ll break down and wash away with the liquid.
Second: control your heat and watch the thermometer. Keep the milk around 50°C (122°F) over medium heat. If it’s too cool, the acid won’t trigger proper curdling and yield will be tiny. If it boils vigorously, the proteins over-tighten and you’ll end up with a tough, rubbery texture instead of a tender, chewy bite.
Third: remove moisture thoroughly and microwave with care. After straining, press the curds by hand to extract as much liquid as possible. If you leave too much moisture, the curds won’t bind during kneading and will turn into a sticky, rice-cake–like mess. Also, never microwave the curd mass for a long stretch at once.
If you lazily zap it for 1–2 minutes straight, the cheese’s flavorful fats will melt into oil and seep out, leaving you with a greasy surface and none of the glossy sheen or springy bite you want. Instead, heat in 20-second intervals, check and knead between cycles, and trust that patience will pay off.


Most Commented